


This magnet design guide is written for engineers, product teams, and sourcing professionals who rely on magnets to perform consistently in industrial systems. Magnets may be small, but they play a direct role in motion, sensing, and control. Poor selection or implementation can lead to inconsistent performance, shorter product life, and high rework costs. Because magnets are often embedded or enclosed, failures are harder to identify and correct.
This guide explains what to consider before finalizing a magnet specification. You will find step-by-step guidance on choosing materials, deciding on magnetization, managing assembly, testing performance, and sourcing reliably.
Step 1: Choose the Right Magnetic Material
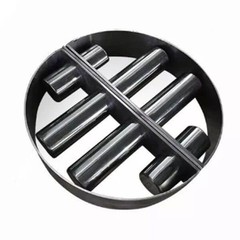
Material selection is the first critical decision in this magnet design guide. Most industrial systems use permanent magnets, which generate their magnetic field. These are found in motors, actuators, sensors, valves, and more. Here are the five common types:
●Neodymium (NdFeB): Strongest available magnet. Compact but sensitive to heat and corrosion. Always needs coating.

●Samarium Cobalt (SmCo): Stable under high heat. Resists corrosion without coating. Less powerful but more durable.

Ferrite (Ceramic): Weak but inexpensive. Large in size. Stable in heat and corrosion-resistant.

●Alnico: Moderate strength. Good for high-temperature or legacy systems.

●Flexible bonded magnets: Low strength. Used in seals, labels, or temporary fixtures.

Your choice depends on the field strength required, space constraints, environmental exposure, and budget. A lower-grade material with better environmental fit often performs better over time.
Step 2: Match the Magnet Shape to the Job

Characteristics and application scenarios of magnets of different shapes
The shape determines where and how the magnet can be placed. Disc magnets are commonly used for flat surfaces and simple press-fit designs. They offer a compact footprint and are easy to bond or mount.
Ring magnets provide a central hole ideal for rotary sensing applications. The shape creates uniform rotation fields, often needed in encoders or gear-based systems.
Arc magnets are specifically designed to fit along curved surfaces, most commonly in brushless DC motors. They allow consistent field delivery across the rotor circumference, improving torque and efficiency.
Bar magnets are longer and spread force across a wider area. These are found in linear actuators or applications that need a magnetic field to extend over a distance. Their shape also helps guide field lines along a predictable path.
Custom shapes may also be required if the system demands non-standard mounting, special field behavior, or packaging constraints. However, custom geometry increases cost and lead time.
Magnet shape and magnetic field propagation
Shape also affects how the magnetic field spreads through space. A disc magnet typically produces an axial field concentrated along the centerline from one flat face to the other. This is useful for direct-contact applications or where a field must penetrate a specific point.
Bar magnets create longer, more diffuse fields. These can reach sensors placed further away but with less intensity at the target point. Ring magnets generate radial fields, spreading outward from the center through the sides. This is critical for rotational systems that rely on changes in field polarity to determine speed or direction.
Each field type has strengths and limits. Picking the wrong shape often leads to redesigning the sensor system or overcompensating by increasing magnet strength unnecessarily.
Risks from Misalignment
Magnets rarely fail by losing strength outright. More often, the field does not land where it should. Misalignment, either mechanical or magnetic, leads to sensors reading noise, motors underperforming, or control systems misfiring.
A common mistake is selecting the right material but placing it in a housing that twists the field, blocks it with nearby metal, or shifts its position slightly off-target. These problems may not show up in lab testing but will appear once the product is exposed to heat, vibration, or long-term use.
To avoid these issues, simulate field paths based on shape and mounting position before finalizing the mechanical design. Doing this early reduces the need for redesign later.
Step 3: Set the Magnetization Direction Early
In this magnet design guide, magnetization direction is the next decision point. It affects how the magnetic field behaves and whether the system responds as expected.
Pick the Magnet Type
Isotropic: Can be magnetized in any direction, but weaker.
Anisotropic: Magnetized during production in one set direction. Stronger and more stable.

Choose the direction
●Axial: Through flat faces (discs, rods).
●Radial: From center to edge (rings).
●Multi-pole: Alternating poles on one face (used in sensors).
Match the Design
The direction needs to match the motion or sensor location. Inadequate torque or signal results from a mismatch. To prevent performance declines and hidden failures, simulate early. Particularly in precision systems, misalignment can result in unstable feedback loops, increased wear, and overheating. During the design and assembly phases, always make sure that the components are oriented correctly.
Step 4: Plan for Mechanical Integration and Coating
Even the best magnet fails if it is not mounted securely. The magnet design guide emphasizes early planning for fit, hold, and protection. Bonded adhesives are reliable on flat surfaces. Press-fit options work well but require tight machining. In high-vibration setups, mechanical locking (clips or covers) adds long-term stability.
Neodymium and other materials often need coatings to prevent corrosion. These coatings add thickness, so final dimensions must be measured after coating, not before. Mechanical and magnetic tolerances must both be defined. The magnet must stay in place, and the field must land where needed. Poor fit or drift causes field failures that are hard to diagnose.
Step 5: Simulate and Field-Test the Design
No magnet design guide is complete without simulation. Field modeling shows how the magnetic field behaves before anything is made. It helps confirm strength, spacing, and interactions with nearby components.
Simulation becomes critical in sensor systems or tight mechanical spaces. Even small changes in position or air gaps can throw off performance.
After the simulation, real-world testing matters. Use:
●Pull force tests to confirm holding strength
●Field mapping with a gaussmeter to check alignment
●Thermal cycling to assess behavior under heat
●For regulated applications, document everything at the batch level.
Step 6: Apply Lessons from Common Applications
The Magnet Design Guide is grounded in real use cases. Here are typical applications:
●Servo motors: Arc magnets generate torque around rotors.
●Linear actuators: Magnets trigger position sensors.
●Valves: Magnetic latching replaces springs.
●Rotary encoders: Rotating magnets track pole changes.
These depend on field stability and alignment. Misplaced or weakened magnets often cause failures that get blamed on sensors or electronics. Better magnet planning prevents this.
Step 7: Choose a Magnet Supplier Carefully
Sourcing is a major step in the magnet design guide. Even a strong design can fail if the magnets arrive late, vary by batch, or underperform in the field.
Check the Grade and Get Real Data
Start with material grade. Neodymium magnets range from N35 to N52. Higher grades are stronger but also more sensitive to heat and corrosion. Choosing the highest grade does not always result in better performance, especially under real-world operating conditions. Request actual test data for your specification, not generic values.


Sample from Production, Not Pilot Runs
If you are ordering at volume, ask for a sample from the same batch you will receive in production. Pilot-run samples may not match mass production. Confirm that tolerances, both mechanical and magnetic, are documented in writing.
Confirm Certifications Early
For regulatory compliance, verify certifications early. Depending on your industry, you may need RoHS, DFARS, or others. Do not assume all suppliers offer compliant products by default.
Ask About Packaging Quality

Packaging also matters. Strong magnets attract dust, metal particles, and other debris during shipping. They can also damage nearby electronics. Poor packaging may result in product loss before anything reaches your assembly line.
Plan for Scaling
If you plan to scale production, check the supplier's capacity and lead times. A small delay on a long-lead custom magnet can halt an entire production schedule. Clarify reorder timelines upfront.
Step 8: Balance Cost with Risk from the Start
The final part of this magnet design guide addresses cost. Strong magnets seem like the safe bet but often bring hidden problems. Simulation and proper design can reduce the need for maximum strength.
|
Common choice |
Hidden risk |
Better option |
|
Strongest magnet available |
High cost, emi, harder handling |
Simulate and optimize shape/placement |
|
N52 grade by default |
Sensitive to heat, prone to corrosion |
Use N42 or N35 with stable geometry |
|
Skip simulation |
Unpredictable performance, late-stage failures |
Simulate and field test early |
|
Cut the magnet cost too early |
Service calls, warranty claims, reliability issues |
Spend slightly more on stable, tested options |
Conclusion
This magnet design guide gives you a clear structure: choose the right material, set the shape and magnetization early, plan for mounting, simulate performance, and work with the right supplier. These steps reduce failure, improve reliability, and save time. Do not treat magnets as small parts, they drive performance, safety, and product success.